Welcome to another edition of Wedding Wednesday!
We've done When & Where.
We've done Colors & Theme.
Today we're gonna talk Bridal Party! Well, my side at least. We're still workin on the boys.
I don't know about you, but I've had a running list of bridesmaids since I was little. Sure it's changed over the years as friends have come and gone, but I've always known who my girls would be were I to need to have an impromptu wedding at any given time.
So, when it came time to put together my list, it took less time to choose my girls than it did to ask them (since I made custom invites for each one...I'll cover that in another post). I ended up with five bridesmaids, three house party ladies, four junior maids, and a flowergirl. That's a total of THIRTEEN girls, and, while I'd never imagined I'd have a bridal party that large, I wouldn't change it for anything.
I adore the group of ladies that has agreed to love on me through this time. They're such a sweet, smart, amazing group - I couldn't ask for better friends.
Here's the line-up:


We've done When & Where.
We've done Colors & Theme.
Today we're gonna talk Bridal Party! Well, my side at least. We're still workin on the boys.
I don't know about you, but I've had a running list of bridesmaids since I was little. Sure it's changed over the years as friends have come and gone, but I've always known who my girls would be were I to need to have an impromptu wedding at any given time.
So, when it came time to put together my list, it took less time to choose my girls than it did to ask them (since I made custom invites for each one...I'll cover that in another post). I ended up with five bridesmaids, three house party ladies, four junior maids, and a flowergirl. That's a total of THIRTEEN girls, and, while I'd never imagined I'd have a bridal party that large, I wouldn't change it for anything.
(By the way, wondering what a "house party" is? In short, it’s an old Southern tradition that honors special guests on
the Bride’s side. While members of the house party don’t participate in the
ceremony, they are still considered a part of the bridal party and they sit with the Bride’s family in the front rows. While the term isn't widely used outside of the South, the practice is. Ever been to a wedding where certain guests were given special jobs like being the guest book attendant or slicing the cake? THOSE are house party type jobs. Now you're caught up!)
I adore the group of ladies that has agreed to love on me through this time. They're such a sweet, smart, amazing group - I couldn't ask for better friends.
Here's the line-up:
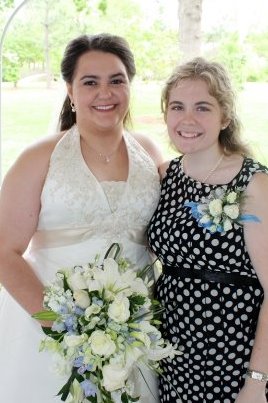
Bridesmaids

Kaitlin Bell: Maid of Honor and best friend.
Confidant, partner in crime, and the other half of the most
ridiculously awesome friendship I could have imagined.
Most likely to stop any
tears with a joke and a hug.
Vicky Henderson: College buddy.
Secret keeper, midnight advice giver, and the big sister I
never had.
Most likely to calm panic mode with tequila shots.

Heather Sparkman: College roommate.
Counselor, prayer warrior, and the logical counterpart to my
dreamer tendencies.
Most likely to remind me what marriage is really about when
I get too caught up in the details.

Brittany Hale: Sister-in-law.
Helper, problem solver, and the sweetest little sister I
could have hoped for.
Most likely to keep everyone calm and on task.

Emma Ellis: Paul’s cousin.
Dreamer, encourager, and one of the happiest people you’ll meet.
Most likely to entertain us with stories of adorable high-school Paul.
(Please enjoy the vintage photo of Paul...Emma, forgive me?)
House Party
Holly Moore: High school & College friend.
She's one of my oldest friends (13 years!) and we keep ending up in the same city. To be honest, I'm perfectly fine if that just keeps happening.
Lauren Esler: Grad School & Work friend.
I made her be my friend during the MBA program when I was desparate for female companionship. Then, we ended up sitting next to each other at Saatchi. She may have left me for the big city, but I still love her to bits.
Allison Liles: Cousin
Growing up across the street from someone makes you a little fond of them. Momma has always called her her "first daughter," which I'm pretty sure makes her my big sister. True or not, I'll keep her.
Junior Maids
Adriana Pate: Cousin
Allie Ellis: Paul's cousin
Becca Ellis: Paul's cousin
Addi Beth Johnson: Cousin
Flower Girl
Mollie Ellis: Paul's cousin
Can't wait to share my day with these ladies! We're gonna have so much fun!
Til next time, friends.