
Apparently we're THAT couple that makes stuff for each other.
I realized this as I was putting together The Boy's Valentine's present and thinking "Oh hey, I should take pictures so I can show everyone how I did this!"
Then I realized I couldn't show y'all...cause, well, he hasn't seen it yet.
I also realized I'd had that thought before, back when I was making his Christmas present. I took pictures of that process, too, and since he HAS seen that one, so can y'all.
Have you seen Wreck It Ralph? If not, you should. It's adorable.
It was also what we did on our first date, so I might be biased.

Anyway, in the movie, the cute little protagonist gives the big burly protagonist a medal made from cookies and candy. Did I mention this movie is adorable?

I loved that moment. It's just such a sweet plot point. I decided that MY big burly protagonist needed his own medal. So that's what he got for Christmas. At first I was just going to make him cookies to look like the medal...but then I realized he wouldn't have one to keep. So, I also made him a "keeper" medal out of Sculpy clay. Tutorials for each are below.


Step 3: Outline the edge of the cookie with white royal icing.


To avoid that, be a bit more patient than it am, and use less icing than you initially think you will need. It WILL spread out. you can help it a little with a toothpick or the tip of the bottle if you need to.


If you want to save yourself some time, you can just wing it. I’m sure it’ll look fine.

I realized this as I was putting together The Boy's Valentine's present and thinking "Oh hey, I should take pictures so I can show everyone how I did this!"
Then I realized I couldn't show y'all...cause, well, he hasn't seen it yet.
I also realized I'd had that thought before, back when I was making his Christmas present. I took pictures of that process, too, and since he HAS seen that one, so can y'all.
Have you seen Wreck It Ralph? If not, you should. It's adorable.
It was also what we did on our first date, so I might be biased.

Anyway, in the movie, the cute little protagonist gives the big burly protagonist a medal made from cookies and candy. Did I mention this movie is adorable?

I loved that moment. It's just such a sweet plot point. I decided that MY big burly protagonist needed his own medal. So that's what he got for Christmas. At first I was just going to make him cookies to look like the medal...but then I realized he wouldn't have one to keep. So, I also made him a "keeper" medal out of Sculpy clay. Tutorials for each are below.
"You're My Hero" Cookies
Step 1: Make your favorite sugar cookies.

Step 2: Roll out the dough and, using a large cookie cutter,
make as many heart-shaped cookies as desired. Bake per recipe instructions and let cool COMPLETELY.

Step 3: Outline the edge of the cookie with white royal icing.
Step 4: Tint your icing a bright teal color. I used Wilton cookie icing and Wilton icing color in teal.

NOTE: Those colorings are POWERFUL. Tint using a teeeeeeny
amount at a time until you reach your desired color. I used a toothpick, dipped
it into the dye, then swirled the dipped pick into the icing bottle. I then
shook and massaged the bottle to distribute the color. It only took two swirls
of the toothpick to achieve the color you see.
Step 5: Once the outline has hardened completely, gently flood
the center of the cookies with the teal icing.

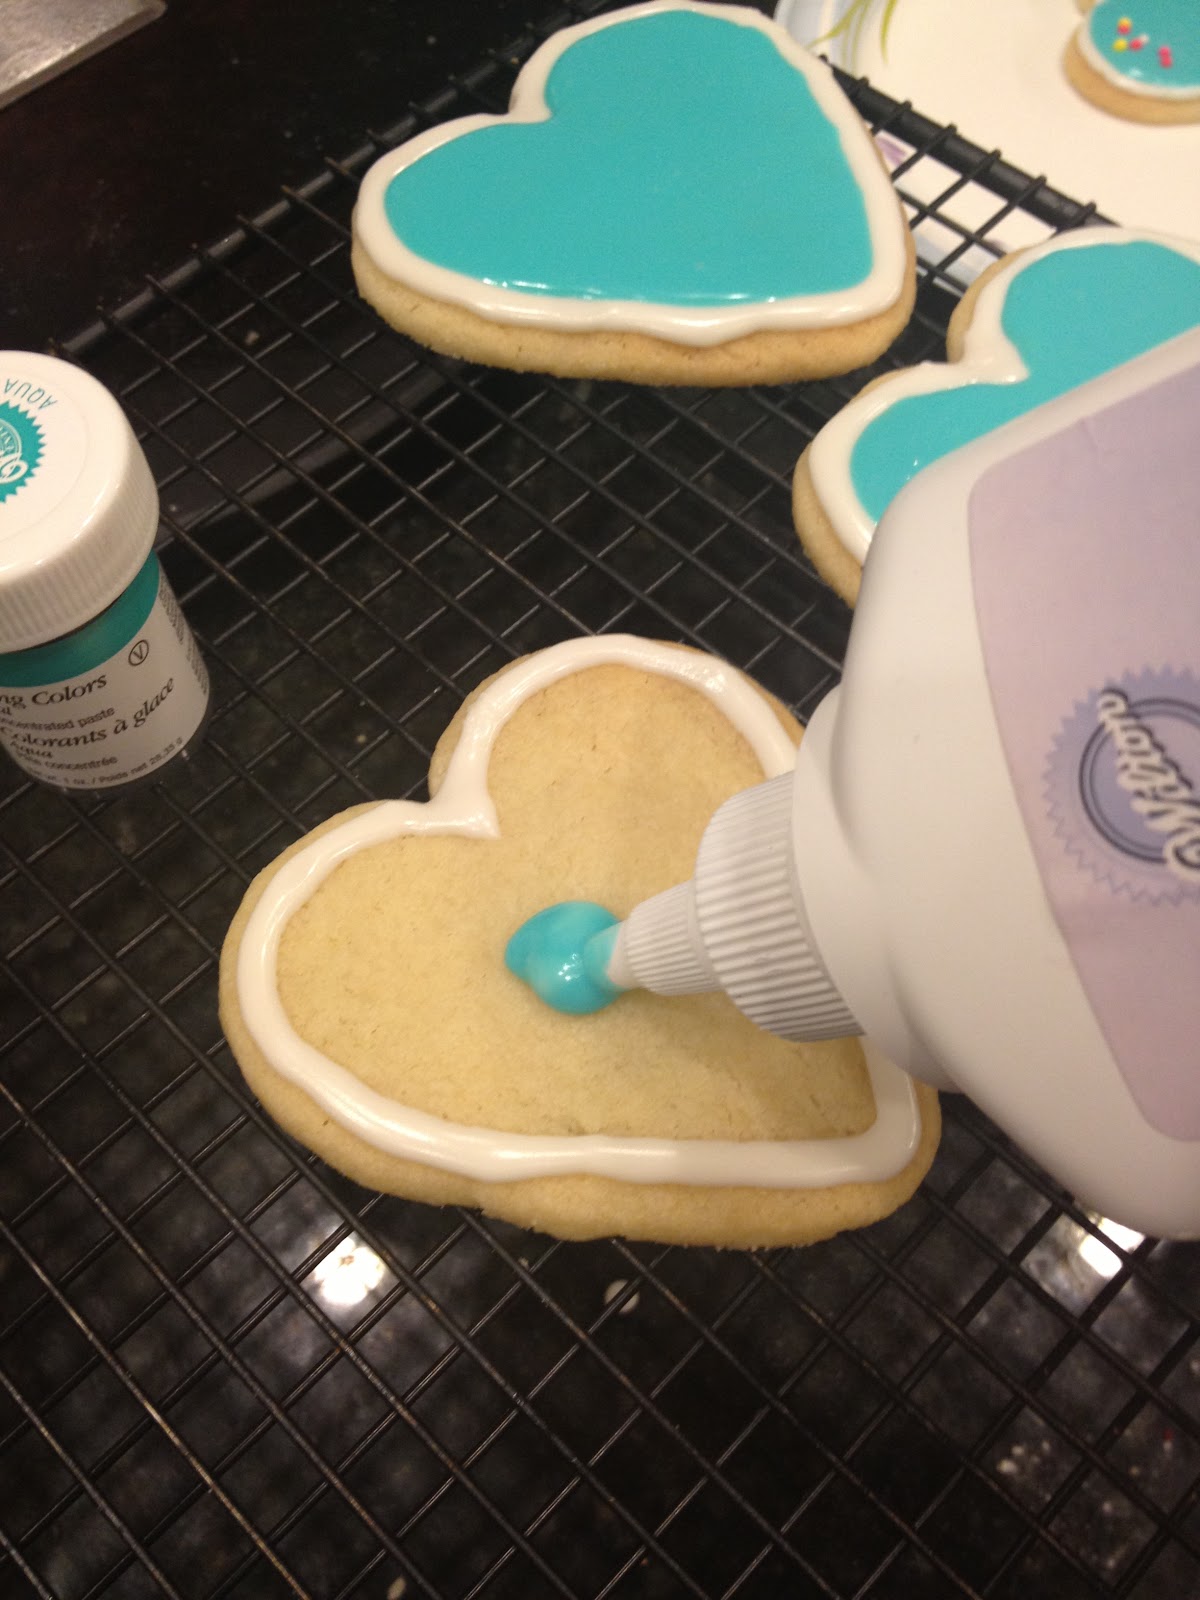

NOTE: This part can be tricky. The outline on the first cookie I tried to fill wasn’t hardened well enough and I ended up with a leaky disaster.
NOTE: This part can be tricky. The outline on the first cookie I tried to fill wasn’t hardened well enough and I ended up with a leaky disaster.
To avoid that, be a bit more patient than it am, and use less icing than you initially think you will need. It WILL spread out. you can help it a little with a toothpick or the tip of the bottle if you need to.
Step 6: Starting with the cookie you iced first, gently
place sprinkles on the cookie.


NOTE: The sprinkles were a labor of love. I started with a multi-colored bottle, but, since I’m a perfectionist, I only wanted to use the colors used in the movie (pink, yellow, and white). So, I painstakingly (with the help of my mother) separated out the appropriate colors then hand placed them on the cookies.
NOTE: The sprinkles were a labor of love. I started with a multi-colored bottle, but, since I’m a perfectionist, I only wanted to use the colors used in the movie (pink, yellow, and white). So, I painstakingly (with the help of my mother) separated out the appropriate colors then hand placed them on the cookies.
If you want to save yourself some time, you can just wing it. I’m sure it’ll look fine.
Step 7: Let your iced cookies sit for AT LEAST one hour. Then, using very stiff white royal icing and a teeeeeny
icing tip, pipe the words onto each cookie. Allow finished cookies to sit til
hardened.
Step 8: Using a couple dots of royal icing and sour gummy
ropes, create the medal ribbon.

NOTE: I got my ropes at the candy store in the mall (but Amazon has the same ones). They
come in all sorts of colors. The sour powder on the ropes makes them resemble
the glittery candy ribbon used in the movie.
Step 9: Package your cookies and deliver to the lucky
recipient!


"You're My Hero" Clay Medal
Step 1: Using a mixture of white and tan clay, create a “baked
sugar cookie” color – enough to create a three inch heart shape (I used a
cookie cutter as a mold). I didn’t want it to be too perfect since it’s
supposed to be a cookie, so I left the lumps and bumps that formed as I
flattened it into shape.
Step 2: Using a mixture of white and turquoise clay, create the
teal color of the cookie. You’ll need less than you needed for the cookie base
since this just forms the icing on top. Press the clay out into a heart shape a
little smaller than the base and press the pieces together. (Don’t worry about
the edges, you’ll cover those next). Wash your hands after handling the teal so
as to avoid tinting the white used next.
Step 3: Using white clay, form a very thin rope and outline
the teal clay. Gently press into the base of the cookie.
Step 4: Using the same white clay and the same thickness
rope, form the letters on the cookie, gently pressing into the teal clay. (Tip:
work with shorter lengths of rope if you’re having trouble controlling the
curves and shapes.)
Step 5 (optional): Using chocolate clay, form another heart
similar to the teal heart. Use this space, and the same white ropes as used in
the above steps, to address your medal to the recipient. This piece will be
placed on the back of the medal once baked.
Step 6: Using small plastic or glass beads, press your “sprinkles”
into the teal clay. I got my beads at Hobby Lobby and picked out the appropriate
sizes and colors from the bag. Also, if you’ve made a back piece, dust the
brown clay with a little bit of glitter (again, optional).
Step 7: Place your pieces on parchment paper and bake
according to clay package directions. Allow to cool completely.
Step 8: Cut a length of ribbon (in the movie it’s pink and glittery) and, using hot glue, attach the ribbon to the back of the beige base.
Then, using additional hot glue, attach the back piece over the ribbon.
Step 9: Package your medal and present to your favorite
hero.

1.Wreck It Ralph is probably the cutest first date movie EVER!
ReplyDelete2. I absolutely LOVE this!!
1. Isn't it? It makes me happy that I get to keep that memory :) I even have Christmas ornaments to commemorate it!
Delete2. Thanks!!!
Question! What type of clay did you use? Is it possible to make my own clay? Thanks!
ReplyDeleteHi! I used the Primo clay you can get at Hobby Lobby or Michael's. I've never made my own clay...so I'm not sure on that one. But I don't see why you couldn't try! Good luck!
DeleteThese are awesome! Fantastic tutorial! Thank you!
ReplyDeleteThank YOU! And thanks for stopping by!
DeleteWhat type of beads did you use? I was thinking they would melt as you baked this.
ReplyDeleteI just used little plastic seed beads from Hobby Lobby. It's not really in the oven long enough or on high enough to melt them. Good luck!
DeleteI want to make the clay medal for my fiance as an ornament very badly! I'm not crafty at all, but we love this movie. I've been looking everywhere for one to buy and cannot find it. I hope I can pull this off!!
ReplyDeletevery nice picture arisha
ReplyDeleteHi! I was just wondering what size cookie cutter you used so that I don't buy the wrong one and end up not being able to frost the words correctly (amateur baker here haha). Thank you! :)
ReplyDeleteSure! I'm still amateur myself :) I used a fairly large cutter - found it at Hobby Lobby a few years back, but this site has tons of options, too (https://www.cookiecuttercompany.com/general/3-point-5-inch-heart-cookie-cutter?keyword=heart). I'd say at least 3.5 in. Better to err on the side of bigger rather than too small!
Delete